
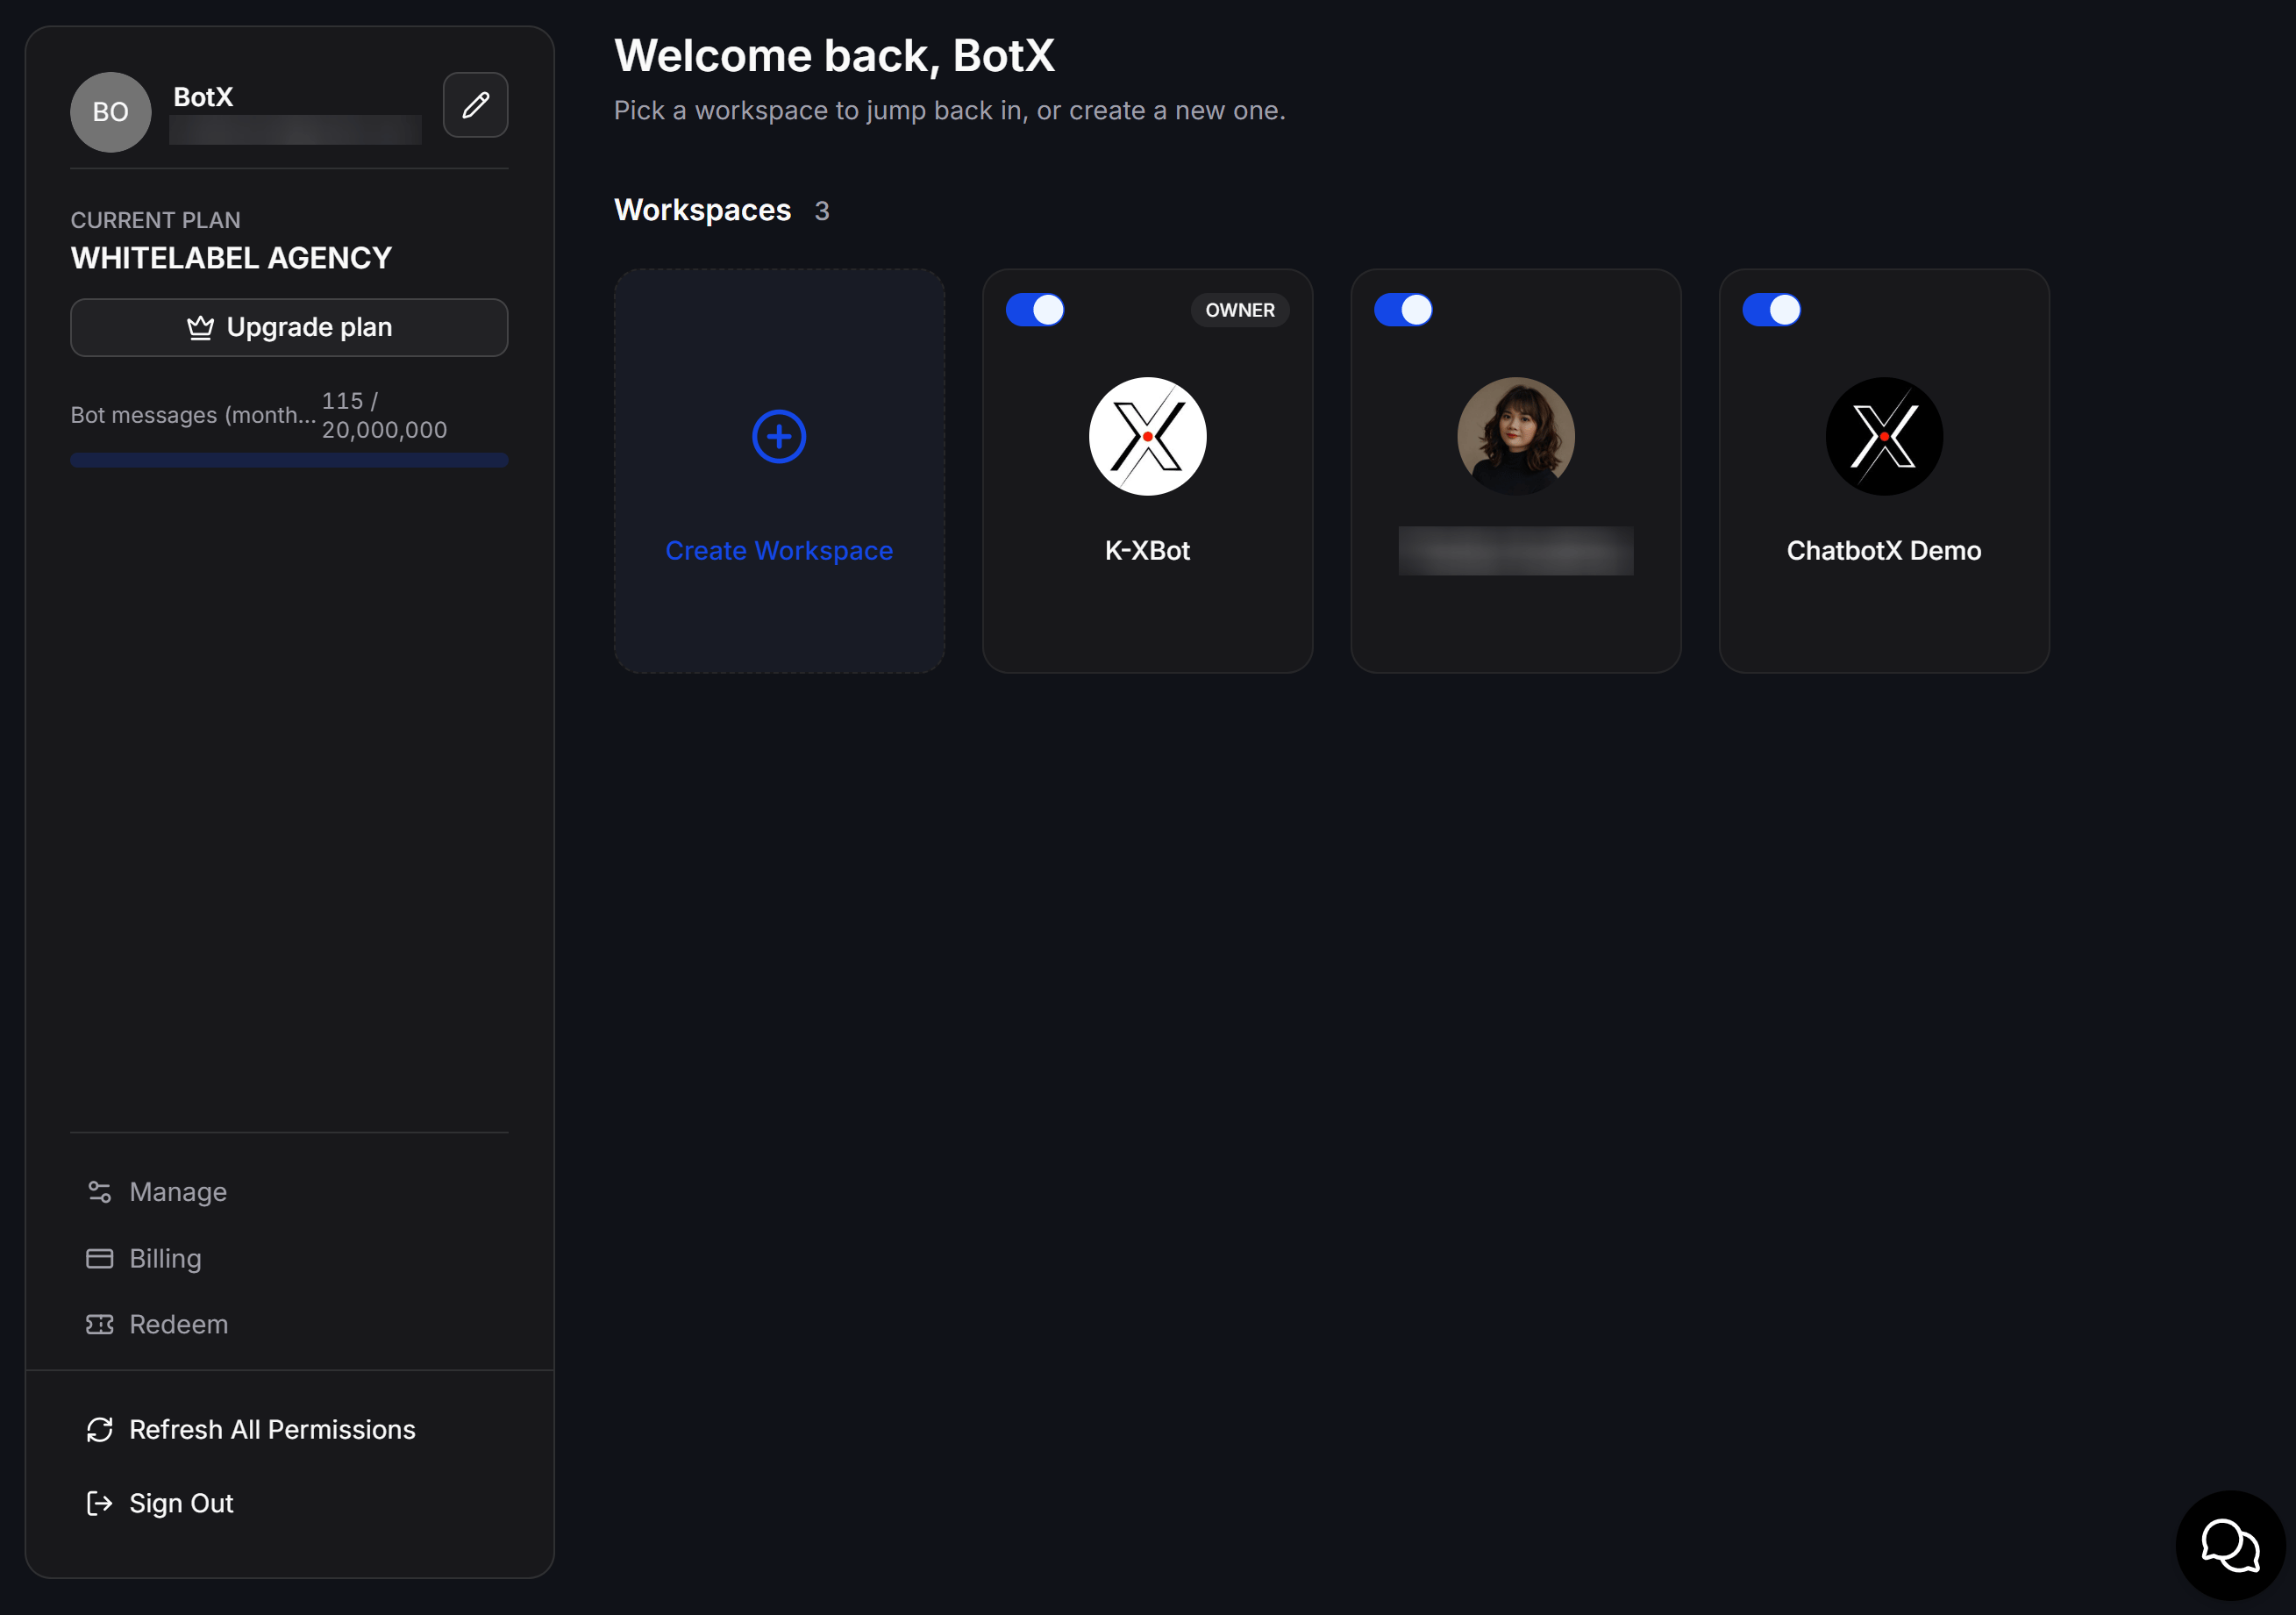
Select or create a workspace
The Workspaces area displays every workspace your account can access.- Select a workspace card to open it and continue working in that workspace.
- The Owner label indicates that you own the workspace.
- Select Create Workspace to create a new workspace.
If you have reached your Plan’s workspace limit, upgrade your Plan or contact the White Label platform administrator for assistance.
Review your account and Plan
The account card on the left side of the dashboard displays your name, email address, and Current Plan.- Select the edit icon next to your account information to update your profile.
- Select Upgrade plan to open the Plan selection page when your White Label platform offers upgrade options.
- The Bot messages bar shows the number of Bot messages used against your current allowance.
Open the account menu inside a workspace
After opening a workspace, select your profile icon at the bottom-left corner to open the account menu. This menu provides quick access to your profile, Plan, Billing, display preferences, permissions, and the sign-out action.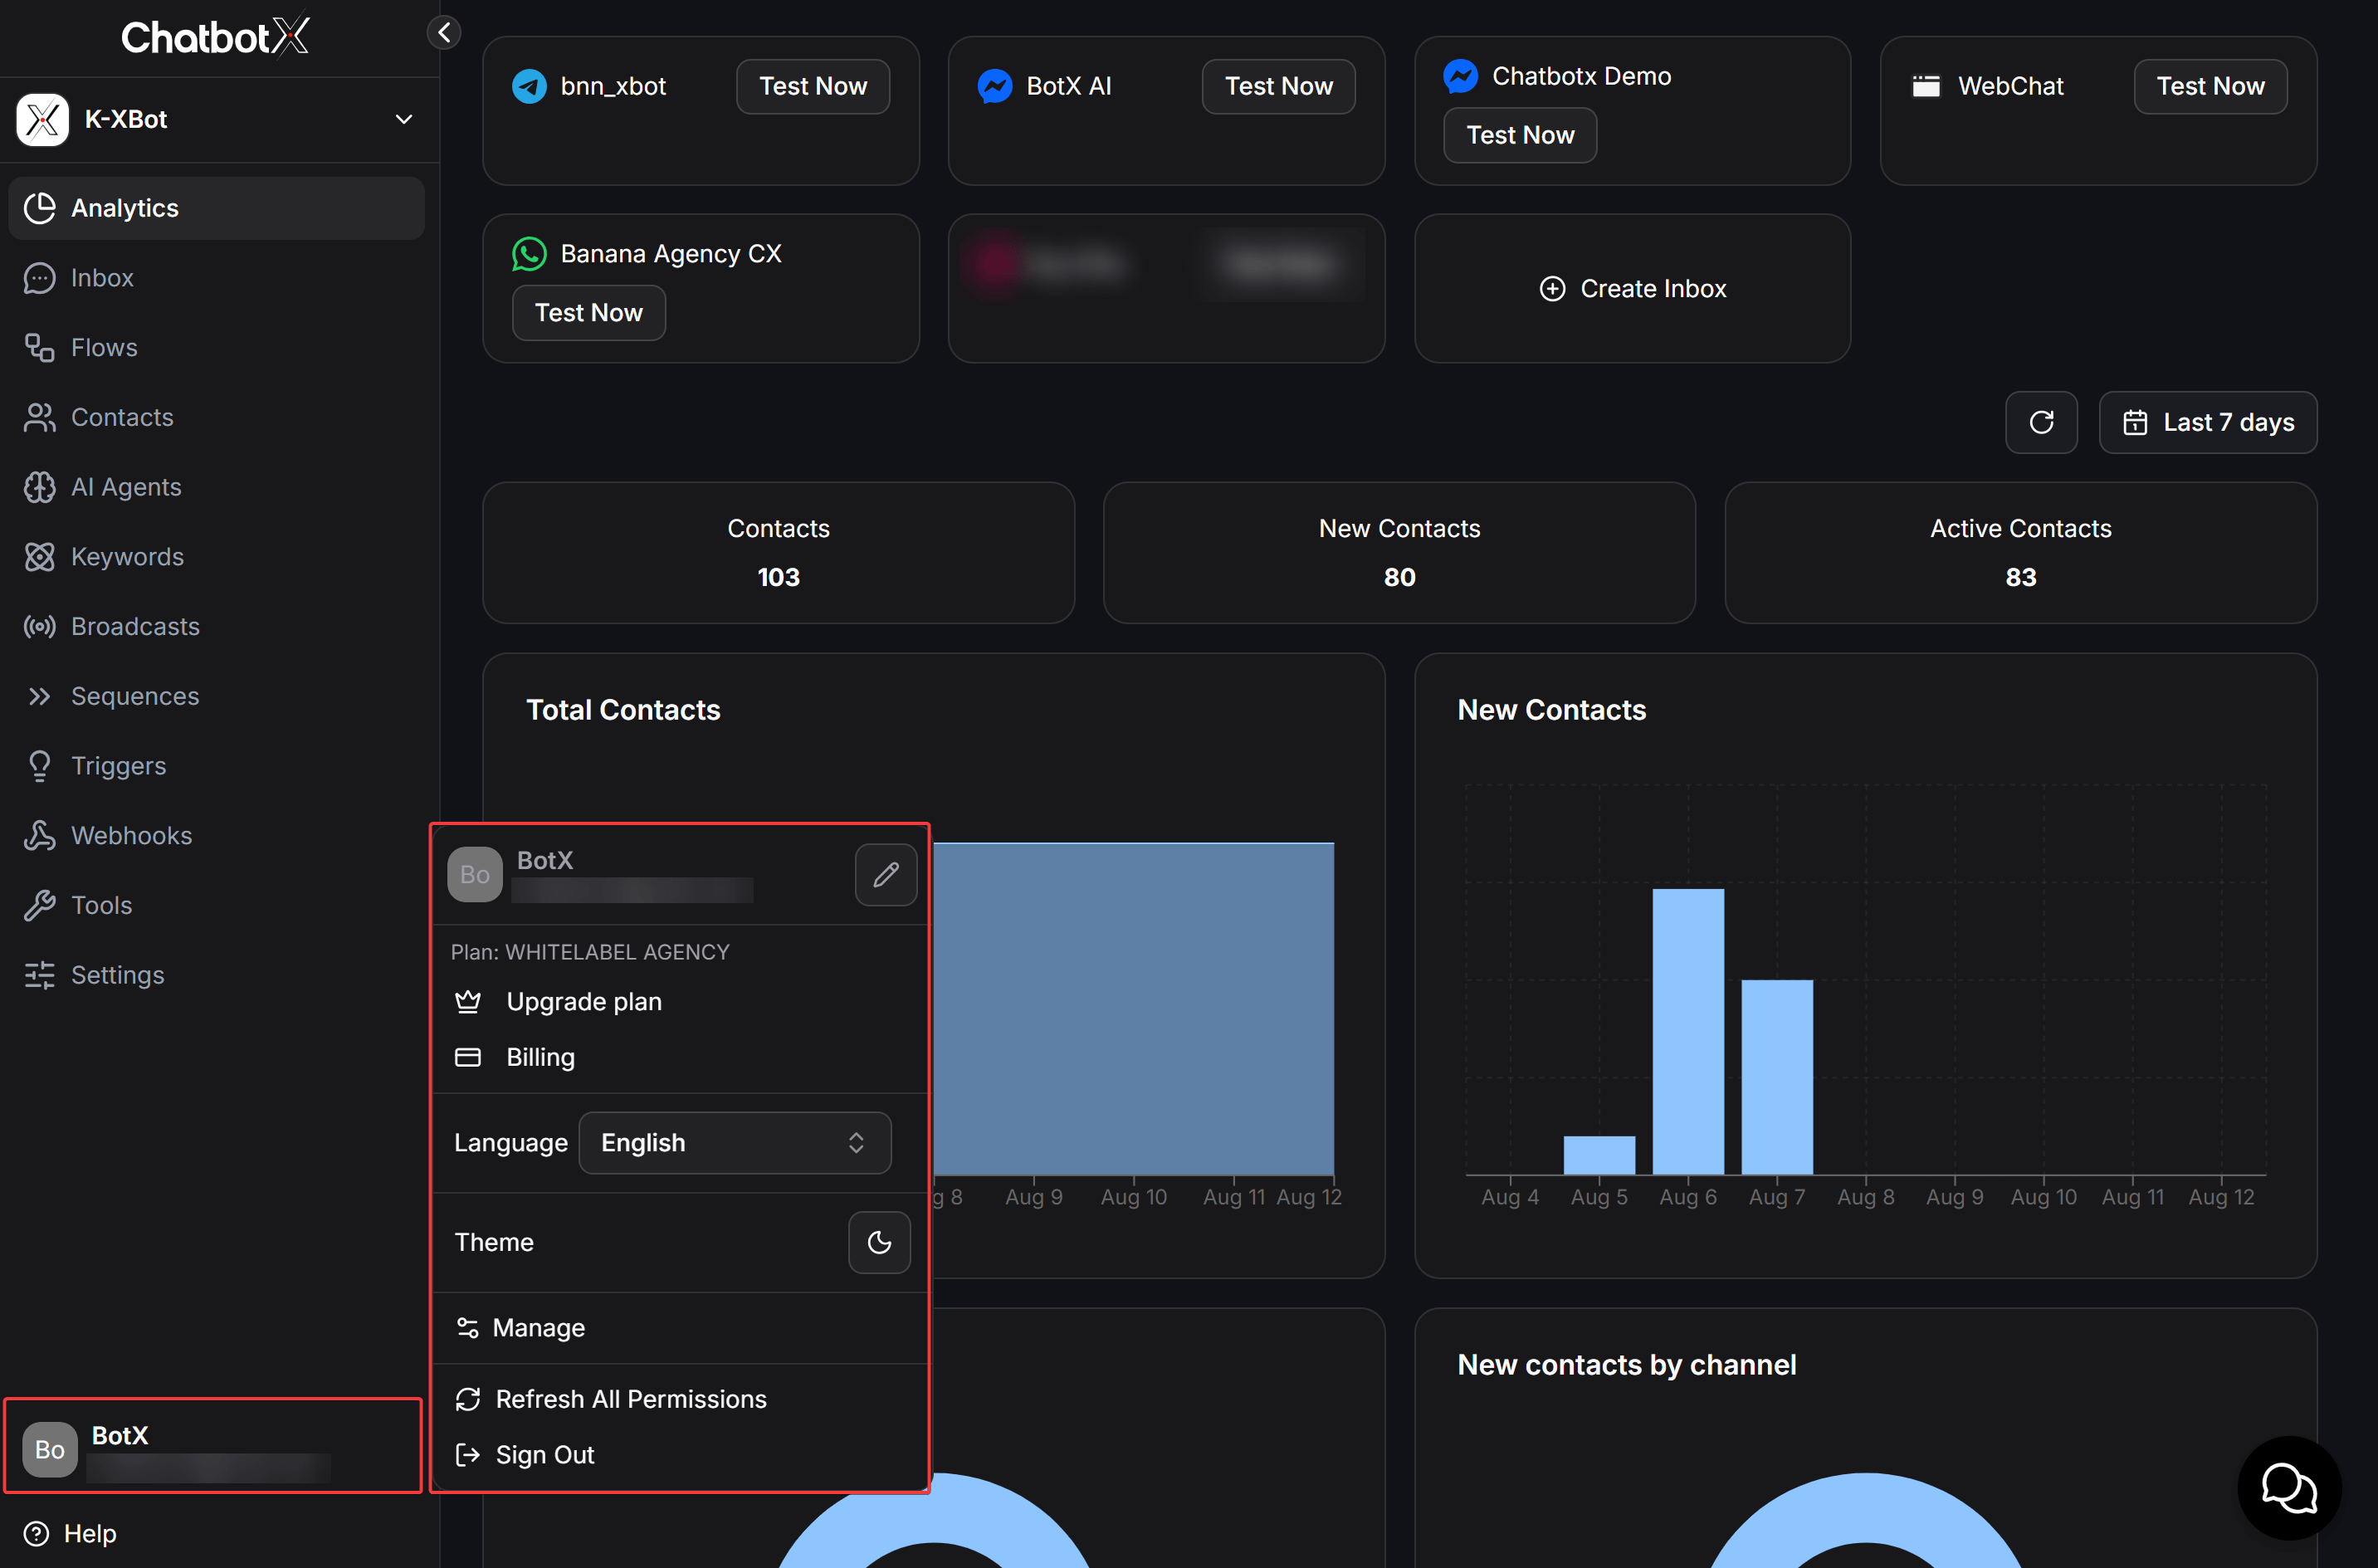
Change the platform language
Open Language in the account menu, then select the language you want to use for the ChatbotX interface. A checkmark identifies the currently selected language.The Language setting changes the platform interface for your account only. It does not translate Flow content or messages sent to contacts.
Change the theme
Select Theme in the account menu to change the interface appearance. The available control switches the platform between its supported display themes (for example, light and dark mode).Manage
Manage opens the White Label configuration area. This area lets you manage app credentials, branding, email settings, and other White Label options.The Manage option is available only when your Plan or customer package includes White Label functionality. An account without White Label access cannot open this configuration area.
Billing
Select Billing to manage your account’s Plan and payments. The Billing page is divided into three sections.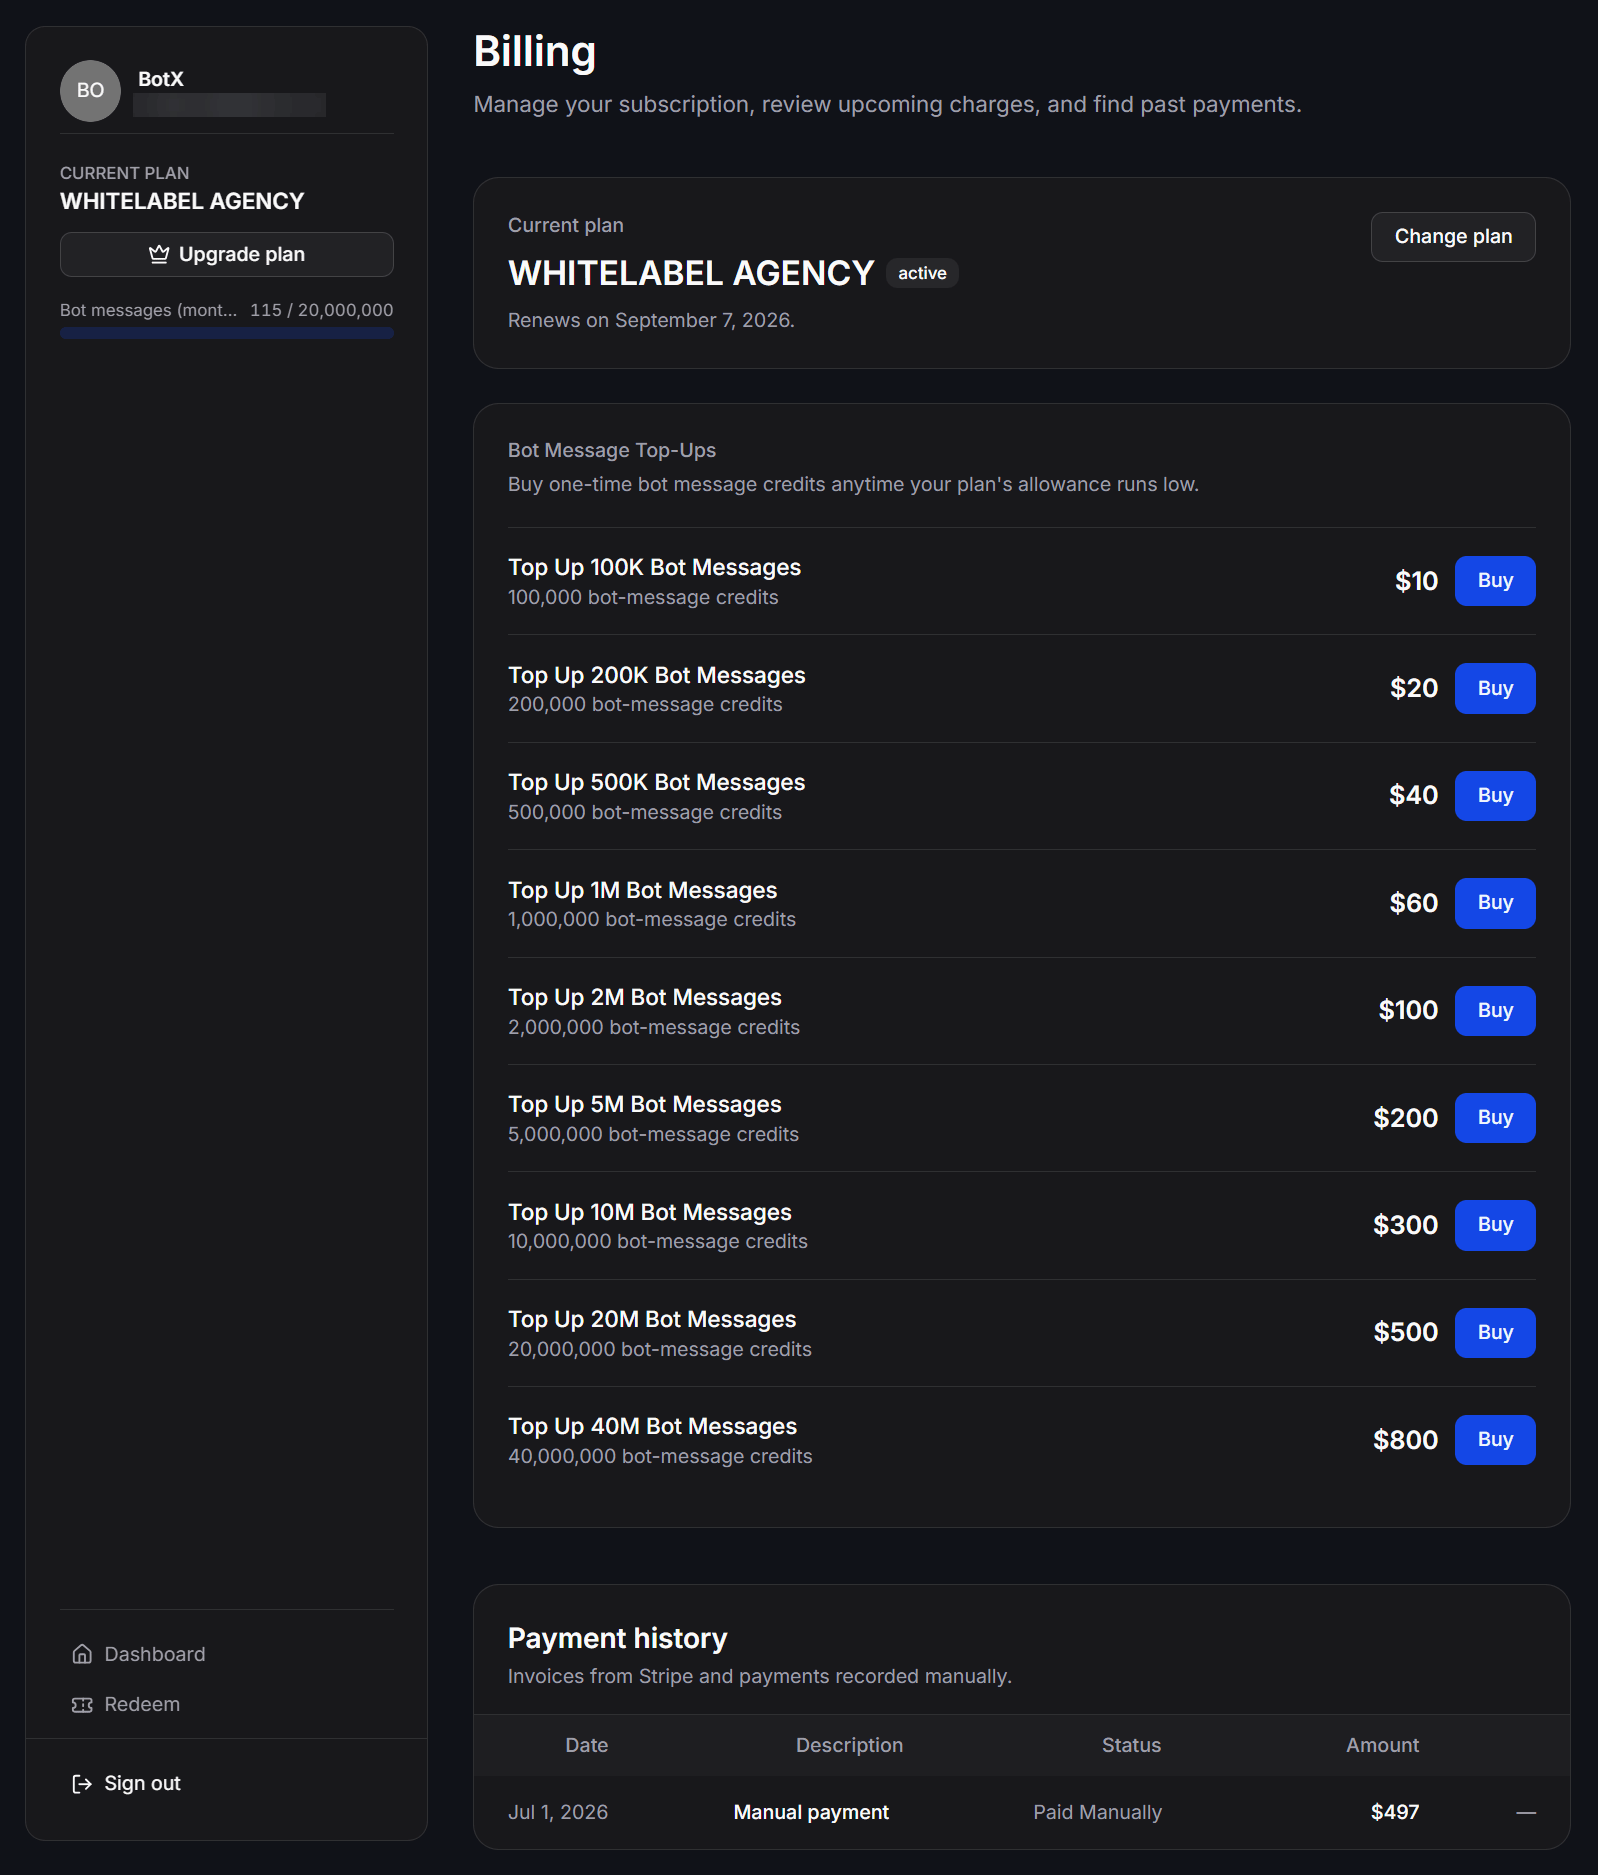
Current plan
The Current plan area displays:- The current Plan name and status.
- The next renewal date for a recurring subscription.
- A Change plan button when the platform provides this option.
Bot Message Top-Ups
The Bot Message Top-Ups area lists the Bot-message credit packs available for purchase. Each row shows the pack name, number of credits, and price. Select Buy next to the appropriate pack to start the payment process. Credits are added to your account after the transaction completes and do not change your Plan’s Workspaces, Channels, Team members, or Monthly active contacts limits.Payment history
Payment history shows the date, description, status, and amount of each transaction. The list can include online payments and payments recorded manually by an administrator.Prices, currencies, renewal dates, and available Top-up packs depend on the configuration of each White Label platform. If you are a White Label administrator, see Plans + Top-up packs to configure Plans and Bot-message credit packs, or Stripe Billing to set up automated payments.
Redeem AppSumo codes
Use Redeem to enter an AppSumo code and unlock the corresponding lifetime deal benefits. The page shows the number of codes you have already redeemed, the available Plan levels, Bot message allowances, workspace limits, and the number of codes required to reach each level.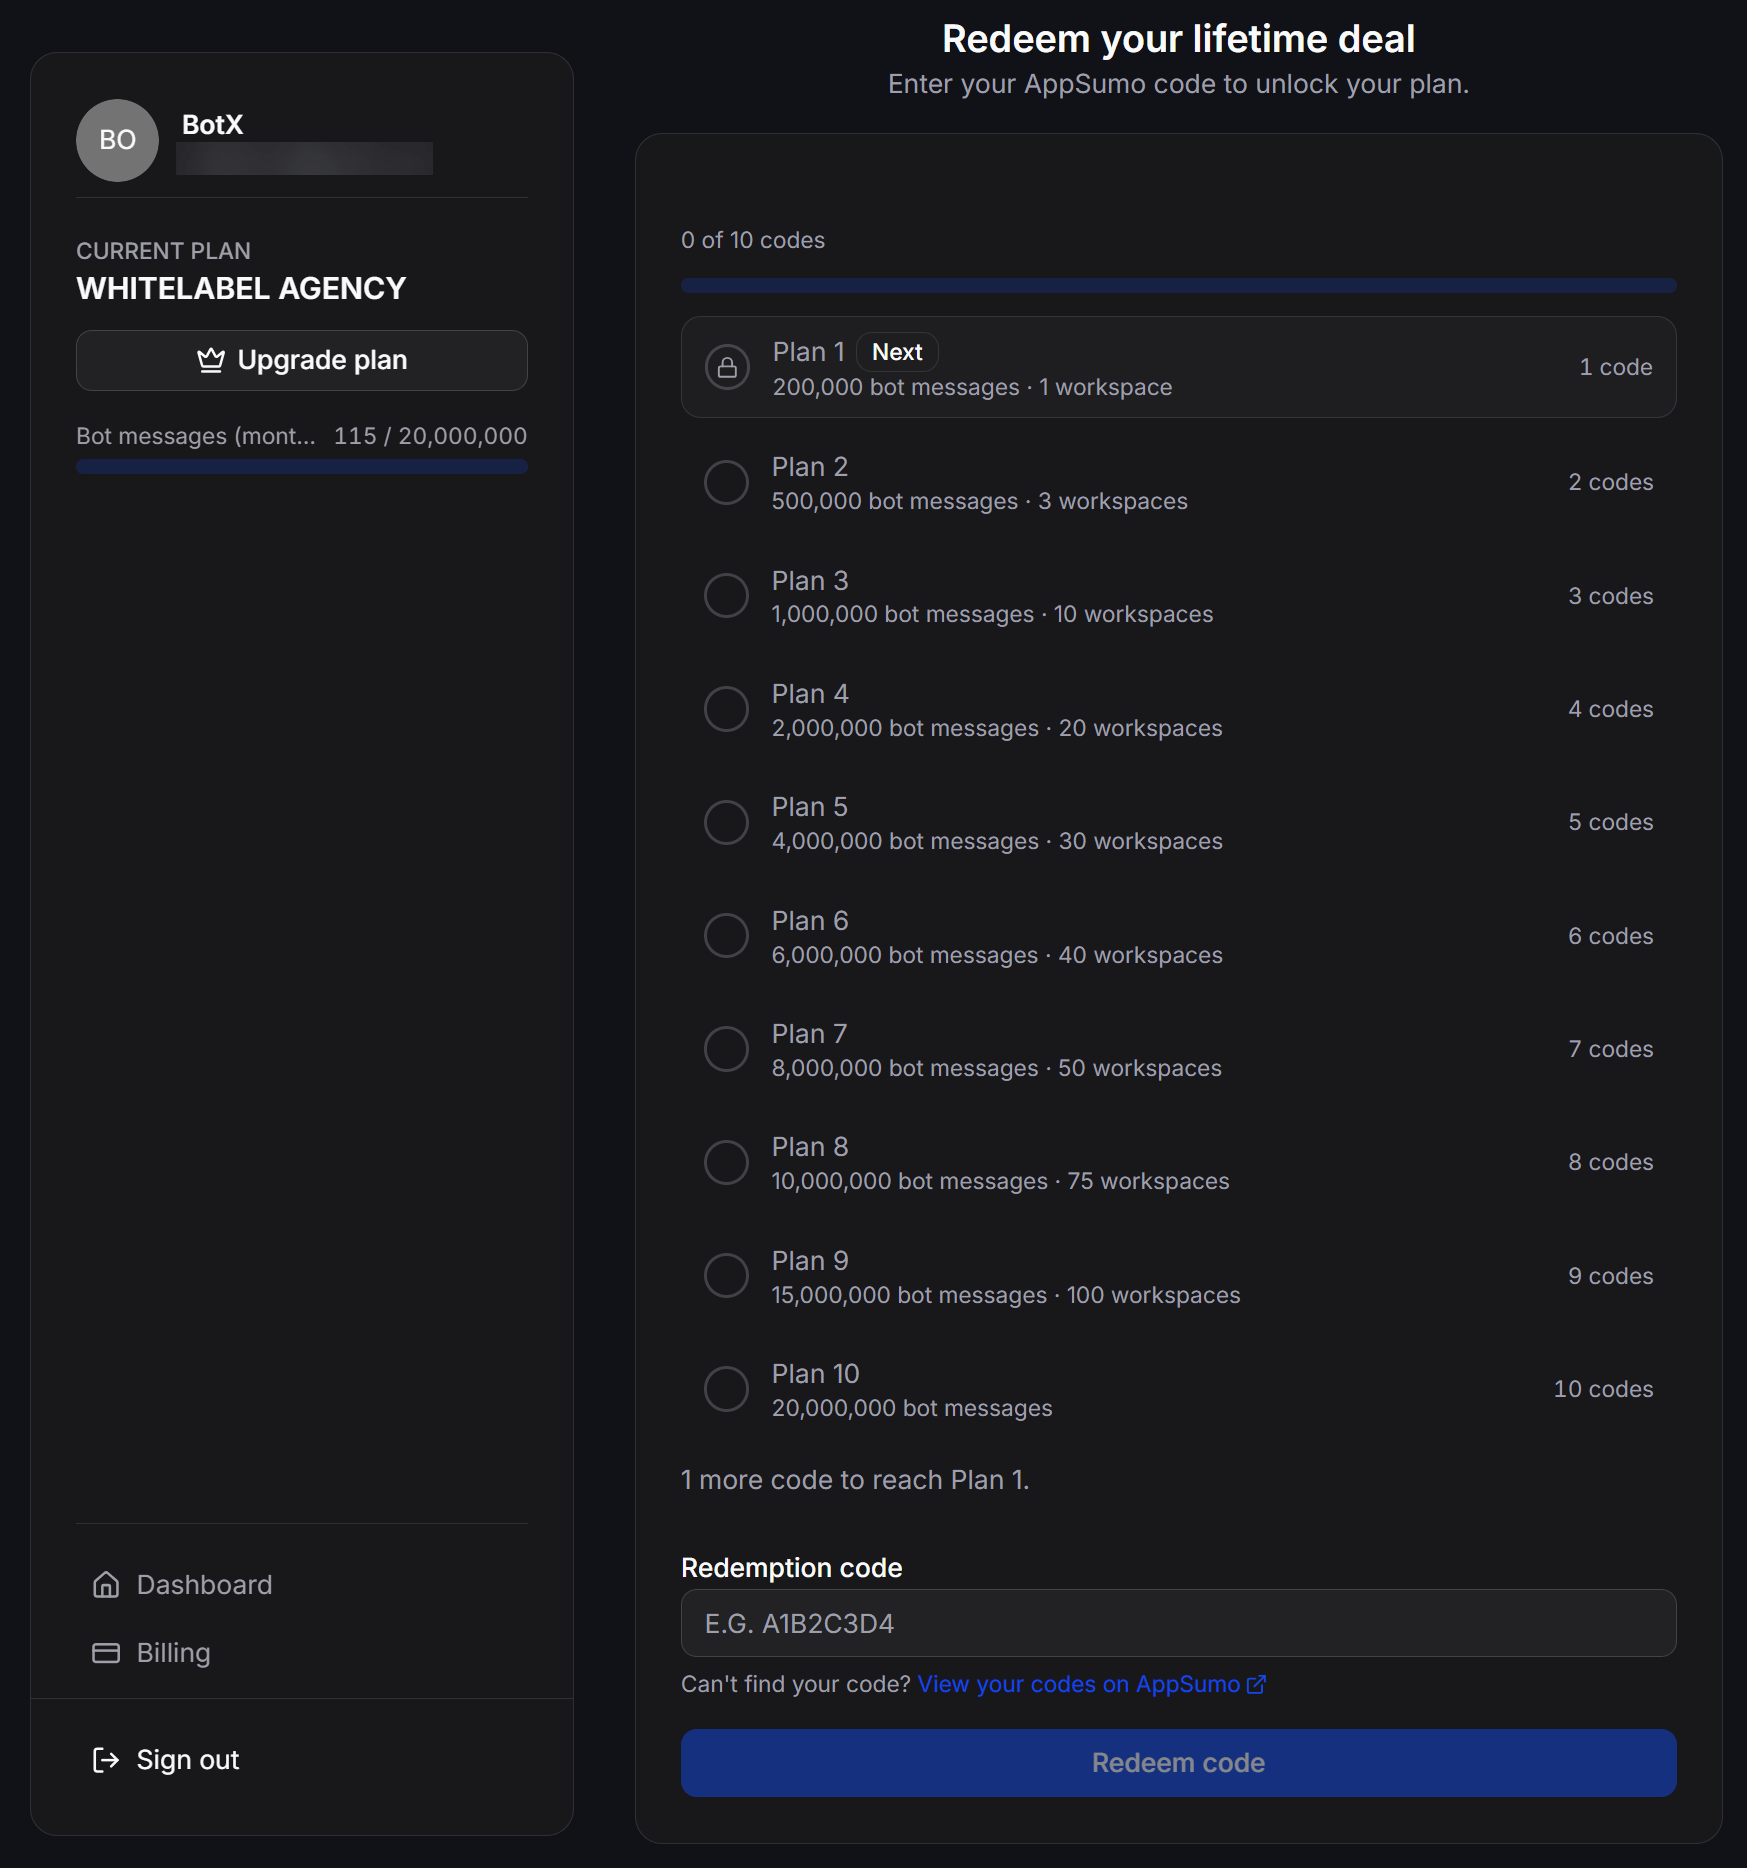
1
Review the Plan level
Check the number of codes required and the benefits of the Plan level you want to unlock before you proceed.
2
Enter the AppSumo code
Enter a valid code in the Redemption code field.
3
Confirm the code
Select Redeem code. After the code is accepted, review the progress indicator and your account’s updated Plan.
Other account actions
Two additional actions are available at the bottom of the account menu:- Refresh All Permissions — Reloads your access permissions after your account’s Plan, role, or permissions have changed. Use this if you have just been granted new access and changes are not yet reflected in the interface.
- Sign Out — Signs you out of the current account.
The menu on the Billing or Redeem page may be shorter than the main Workspace Dashboard menu. Select Dashboard to return to the full workspace list at any time.